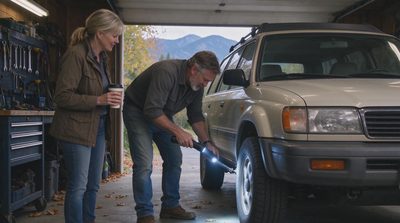
Most Subaru owners pay a shop to change two filters that sit in plain sight and cost less than a tank of gas. The cabin filter lives behind the glove box; the engine filter sits in a black plastic box under the hood. Both jobs take under twenty minutes once you know where the clips and dampers are. Doing them yourself keeps the interior smelling fresher, the engine breathing cleaner, and a few dollars in your pocket every service interval. Here is the practical sequence that works on recent Outback, Forester, and Crosstrek models.
Why These Two Filters Matter More Than Most Owners Realize
The engine air filter keeps dust, pollen, and road grit out of the intake tract. A clogged filter forces the engine to work harder for the same power and can slowly reduce fuel economy. The cabin filter cleans the air that enters the HVAC system. When it is dirty the vents blow dust, the defroster works less effectively, and a musty smell often appears after rain or in humid weather.
Subaru’s maintenance schedule typically calls for the cabin filter every 15,000 miles or 15 months and the engine filter every 30,000 miles under normal conditions. In dusty Western states, pollen-heavy spring seasons, or areas with frequent forest-road driving, both filters load up faster. Checking them at oil-change time is cheap insurance. A filter that looks gray and packed with debris is already restricting airflow even if the service light has not yet appeared.
Replacing them yourself removes the labor charge that often exceeds the price of the parts. The job requires no special tools beyond a flat screwdriver or your fingers, and the risk of damaging anything is low if you work deliberately.
Tools and Parts You Actually Need
You need the correct engine air filter and cabin air filter for your model year. OEM part numbers vary slightly by generation, but most recent Outback, Forester, and Crosstrek filters interchange within a few model years. Aftermarket filters from reputable brands work fine; choose a particulate or activated-carbon cabin filter if you want better odor control.
A flat-blade screwdriver or plastic trim tool helps with the occasional stubborn clip. Needle-nose pliers are useful for the engine-filter hose clamp on some models. A shop light or phone flashlight makes the glove-box area easier to see. That is the entire list. No jack, no sockets, no scan tool.
Buy the filters before you start so the car is not left open while you run to the store. Keep the old filters until the new ones are installed and the car is back together; it is the simplest way to confirm orientation if the packaging is unclear.
Replacing the Cabin Air Filter Behind the Glove Box
Open the passenger door and empty the glove box. On the right side of the glove-box housing you will find a small damper strut. Squeeze or slide the clip to disconnect it so the glove box can drop fully. Next, press the two side stops inward so the glove box swings down past its normal stops and hangs out of the way.
Behind the glove box is a rectangular plastic door held by two clips at the bottom. Squeeze the clips and pull the door toward you. The cabin filter slides straight out. Note the direction of the arrows or the “UP” marking on the old filter before you discard it. Most aftermarket filters use airflow arrows that should point downward once installed; OEM filters often simply say “UP.”
Slide the new filter in with the correct orientation, snap the door back in place, lift the glove box until the side stops click, and reconnect the damper. The entire sequence takes five to eight minutes once you have done it once. A musty smell that disappears after the first few days of use is the usual confirmation that the old filter was the culprit.
Replacing the Engine Air Filter Under the Hood
Open the hood and locate the black plastic air-filter box, usually on the passenger side of the engine bay. On many recent models two plastic rivets or clips hold an intake duct or cover in place; pop them free and set the cover aside. Unclip the metal or plastic latches that secure the upper half of the filter box, then lift the lid.
Pull the old filter straight out. Wipe any loose debris from the bottom of the box with a clean rag so the new filter seats on a clean surface. Drop the new filter in with the same orientation the old one had—usually the rubber sealing edge faces up or toward the intake tube. Close the lid, re-engage the latches, and reinstall any duct or cover you removed.
Some models use a worm-gear clamp on the intake hose; loosen it only enough to move the hose if needed, then retighten firmly but not aggressively. The whole job is usually finished in under ten minutes. A visual check of the old filter tells you whether your driving environment is harder on the filter than the schedule assumes.

Common Mistakes That Turn a Simple Job into a Longer One
Forcing the glove-box stops without pressing them inward can crack the plastic. Disconnecting the damper incorrectly can leave the glove box slamming shut later. Installing the cabin filter upside-down restricts airflow and can cause the HVAC system to whistle or under-perform. Leaving debris in the engine-filter box can let dirt past the new filter on the first drive.
On the engine side, overtightening the intake-hose clamp can distort the plastic neck. Forgetting to reattach a sensor connector or the MAF plug (on models where it is nearby) will set a check-engine light that is purely self-inflicted. Working in bright light and taking a phone photo before you remove anything prevents most of these issues.
If the new filter does not seat easily, stop and check orientation rather than forcing it. Filters are designed to slide in with light pressure once the direction is correct.
Model-Year and Trim Differences Worth Noting
The basic glove-box and under-hood procedures are consistent across 2018–2026 Crosstrek, Forester, and Outback models because they share platform architecture. Wilderness trims use the same filter locations; the extra cladding and underbody protection do not change the filter boxes. Hybrid models follow the same cabin-filter steps; the engine-filter box is still accessible, though packaging around the hybrid components can make the lid a little tighter.
Always confirm the exact part number for your VIN if you are ordering online. A filter that is a half-inch too thick or too thin will not seal properly. The owner’s manual lists the recommended intervals; dusty conditions or frequent dirt-road use justify checking earlier.
When to Stop and Let a Shop Handle It
If the glove-box damper is broken, the plastic stops are already cracked, or the filter box latches are brittle and snap, the job is no longer a simple filter swap. The same is true if you discover a torn intake boot or a disconnected sensor while you are under the hood. Those items are still inexpensive, but they turn a ten-minute filter change into a diagnosis.
Owners who are uncomfortable working around the HVAC housing or who simply prefer not to drop the glove box can still save money by supplying the filters and paying only for labor. The point of the DIY route is not to prove toughness; it is to avoid paying shop rates for two of the easiest maintenance items on the car.
Before you spend:
Check the symptom. Count the cost. Then decide.